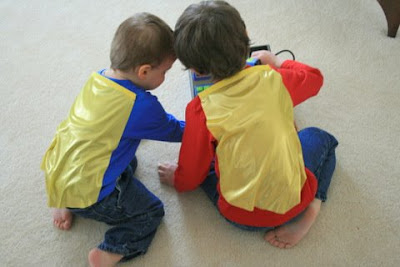
If you keep your eyes peeled near the end of a season you can pick up some fantastic deals on simple long or short sleeved shirts that are perfect to embellish. I found these for $2.50 each. I bought a shirt for each of the older boys and a long sleeved onsie for the little one.

Here's what you need:
Ready made shirt washed and dried to shrink it (you can do this twice to be sure)
Two contrasting colored shirts to cut up for the applique in the same type of fabric as your ready made shirt (I used a stretch jersey)
Heat N Bond
*Matching thread and a sewing machine
Two pieces of hook and loop tape such as Velcro or snaps
Fabric for cape
Bias tape
Glue stick
Wrapping paper, newspaper or whatever large paper you can find to trace the cape pattern
*If you cannot sew simply applique your shapes with fabric puffy paint available at any craft supply store instead of using thread.
 1. Using a computer drawing program or drawing freehand, plan the shape of your emblem and choose your font. The simpler, the better. Lay it out on the shirt to be sure it fits.
 2. Trace your shape onto the paper side of the Heat N Bond.
 3. Iron the Heat N Bond onto the wrong side of your your emblem applique fabric and the letter applique fabric according to the instructions. Cut the shapes out following your traced line.
 4. Now press your letter onto the emblem following the Heat N Bond instructions.
 5. Sew around the letter using a zig zag stitch and backstitch at the corners. If you are not using a sewing machine for this project now is the time to break out the fabric puff paint and use it to outline the letter.
 6. Here is the back side of the appliqued letter with the paper backing still attached.
 7. Peel the paper backing off of the emblem being extra careful to avoid ripping out any of your stitches. Don't worry too much about the small pieces of paper left between the zig zags as these will be be hidden when it is pressed to the shirt.
 8. Press the emblem to the front of your ready made shirt. Using the same zig zag stitch sew around the emblem being careful to avoid catching the back of the shirt as you applique. Use puffy paint here if you are not sewing.
 9. I used an inexpensive cut of a shiny novelty knit for the cape. There was no need to hem the raw edges- yay!
 10. Measure the distance between the shoulders where the cape will be attached and draw a line using this measurement on your pattern paper. Put a dot on the halfway point of this line. Measure how long you want to cape to hang and draw a point that distance down from the halfway dot on the line. Now finish the drawing by adding lines like my pattern above. Cut out the pattern, lay it on the fabric and then cut out the cape.
 11. Glue the bias tape onto the top of the cape and then sew it in place. Use a permanent fabric glue if you are not sewing to keep the tape in place.
 12. Sew or glue the hook and loop tape or snaps in place on the shoulders and the cape. If you use hook and loop tape be sure to cut the corners off of your squares so they do not scratch or become caught on other clothes in the washer.
 Put it on your little one and marvel at your adorable super hero! Then, go ahead, make one for yourself too- everyone wants to be a hero...


